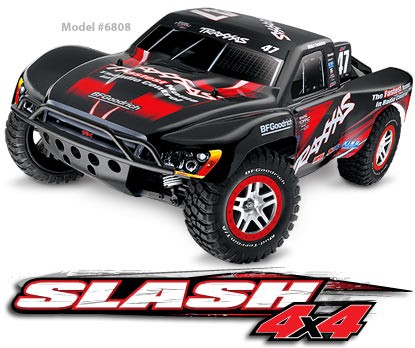
SHOCKING SECRET: Traxxas Slash 4WD's Nude Body Shell Exposed In New Leak!
Have you ever stared at your Traxxas Slash 4WD and thought, “This incredible machine deserves a body that’s as unique and tough as it is?” The world of RC rock crawling and bashing is filled with iconic rigs, but the search for that perfect, head-turning shell can feel like an endless, frustrating quest. What if the secret to unlocking your Slash’s ultimate potential wasn’t in a motor upgrade or a suspension kit, but in the very skin it wears? A shocking new trend is exposing the raw potential of the “nude” Traxxas Slash 4WD body shell, and enthusiasts are painting, customizing, and transforming them into rolling works of art. This isn’t just about aesthetics; it’s about enhancing both the aesthetics and performance of your rig in ways you never imagined. Let’s dive deep into the revolution happening on Traxxas Slash bodies.
My own journey down this rabbit hole began on a quiet Saturday. Today I get around to painting a new body for my Traxxas Slash 4x4 VXL. For weeks, that pristine, clear polycarbonate shell had been sitting on my workbench, a blank canvas begging for a personality. The choice of color and design was agonizing—should I go for a bold, aggressive look or something more understated and scale? After hours of masking and spraying, the final reveal was electric. I’m really happy with the color I just hope it holds up. That last part is the silent prayer of every RC painter. Will the vibrant prographix paint survive the inevitable rollovers, scrapes, and jumps? The proof, as they say, is in the pounding. After a full weekend of aggressive trail runs and backyard bashing, I tested them and couldn't be happier. The finish was intact, the colors still popped, and the shell showed only the lightest, most honorable scars of battle. The durability was real.
But this journey to a perfect paint job started much earlier, with a simple, frustrating question: “I can't seem to find any good body options for the Traxxas Slash, what are some cool bodies people have used?” Scouring hobby shops and online forums, I was met with a sea of the same few options. The iconic Ford F-150 Raptor and the classic Pro-Line bodies are fantastic, but after a while, they start to look… familiar. I'm hoping I can find something that's more scale looking, those F150 bodies look flattened and… There’s a kernel of truth there. Many pre-painted or popular shells prioritize durability and brand recognition over true 1:10 scale realism. The proportions can sometimes feel off, the details shallow, leaving scale enthusiasts like me craving something with more presence, more weight in its visual design. This gap in the market is precisely where the new wave of custom and modified bodies is exploding.
- Maddie May Nude Leak Goes Viral The Full Story Theyre Hiding
- Shocking Leak Hot Diamond Foxxxs Nude Photos Surface Online
- Shocking Exposé Whats Really Hidden In Your Dixxon Flannel Limited Edition
The Critical Compatibility Puzzle: Post/Clip vs. Clipless Chassis
Before you even think about paint or style, there is a non-negotiable technical hurdle: body mounting compatibility. This is the secret that trips up countless newcomers and even seasoned veterans. These bodies are for chassis' with post and clips, if using with clipless chassis the body will require TRA6929 clipless conversion kit for. Let’s decode that. The Traxxas Slash 4x4, especially the VXL and older models, typically uses a post and clip mounting system. Small plastic posts on the chassis slide through holes in the body, secured by flexible plastic clips. It’s simple, effective, and secure.
However, many modern aftermarket chassis (like those from ARRMA, Axial, or custom-built rigs) and even some newer Traxxas models use a clipless system. This system uses pins or posts that lock into dedicated body mounts without traditional clips, often allowing for easier body removal and a cleaner look. If you purchase a standard “post and clip” body for your clipless chassis, it simply won’t fit. The holes won’t align. This is where the TRA6929 clipless conversion kit becomes your best friend. This official Traxxas kit includes the necessary posts and hardware to adapt your clipless chassis to accept the vast universe of standard post/clip bodies. Ignoring this step is the #1 reason for a failed body purchase. Always, always verify your chassis mounting type before clicking “buy.” It’s a small part that unlocks a world of options.
From Blank Canvas to Masterpiece: The Art and Science of Painting
With the right body in hand and compatibility confirmed, we arrive at the creative core: painting. Custom body flag star style for Traxxas Slash 1/10 4x4 2WD Slayer shell cover $36.98 USD is more than just a product listing; it’s a gateway to personalization. That price point reflects the raw, unpainted polycarbonate shell—your starting point. The process is where magic happens, but it’s also where mistakes are made.
- Shocking Gay Pics From Xnxx Exposed Nude Photos You Cant Unsee
- Tj Maxx Gold Jewelry Leak Fake Gold Exposed Save Your Money Now
- One Piece Creators Dark Past Porn Addiction And Scandalous Confessions
Step 1: Preparation is Everything. Never skip this. Wash the body inside and out with mild soap and water to remove any mold release agents. Dry thoroughly. Lightly scuff the outside of the body with very fine (1000+ grit) sandpaper or a scuff pad. This creates a “tooth” for the paint to grip. Wipe clean with a lint-free cloth dampened with window cleaner or alcohol.
Step 2: Priming. Use a polycarbonate-safe primer (often labeled for “RC bodies” or “lexan”). Spray light, even coats from about 10-12 inches away. Two thin coats are better than one thick, runny coat. Let it cure fully (check manufacturer’s times, usually 15-30 minutes).
Step 3: The Paint Job. This is where your flag star style or any custom graphic comes to life. You can use:
- Spray Cans (Testors, Tamiya): Convenient, good for solid colors and simple fades.
- Airbrush: The gold standard for control, gradients, and intricate details like flames, graphics, and weathering.
- Pre-cut Vinyl Decals: Applied over a base color for complex designs without the airbrush learning curve.
Pro-Tip: Always paint in a dust-free, well-ventilated area. Use a rotating turn-table for even coverage. Mask carefully with high-quality tape to avoid bleed-under.
Step 4: Clear Coating. This is non-negotiable for durability. A final coat (or two) of polycarbonate-safe clear coat seals the paint, adds depth, and provides a sacrificial layer against scratches. Matte, satin, and gloss finishes are available.
Step 5: Cutting and Mounting. Once fully cured (24+ hours is wise), carefully cut out the body with a sharp hobby knife. Use a cutting mat and a ruler for straight lines. Then, install your TRA6929 kit if needed, and mount the body. The moment of truth: Does it look as you envisioned? Does it fit snugly without stress points? That final fit is the culmination of your work.
The Rise of the Custom Body: Your Number 1 Source for Scale Realism
This leads us to the heart of the “shocking secret.” The market is shifting. Your number 1 source for R/C modified bodies is no longer just the big brand catalog. It’s the thriving ecosystem of custom made RC dirt modified bodies for Traxxas Slash and many other styles and sizes. Small, specialized workshops and online artisans are using advanced CAD and CNC machining to create bodies with true scale proportions, realistic panel gaps, detailed grilles, and functional-looking accessories that mass-produced bodies often lack.
These aren’t just repaints; they are new designs. Think classic ’70s muscle car shells, detailed monster truck “tubs,” scale buggy replicas, and yes, even more realistic interpretations of the popular truck styles that felt “flattened.” They are engineered for optimal weight distribution and aerodynamic efficiency, not just looks. Offering custom made RC dirt modified bodies for Traxxas Slash means you can get a body that is designed for the Slash’s wheelbase and track width, ensuring a perfect fit that enhances handling, not hinders it. This is where you enhance both the aesthetics and performance simultaneously.
Decoding the Clipless Polycarbonate Revolution
A specific innovation is making waves: This clipless polycarbonate body features the hottest prographix paint with pre… (applied graphics). Let’s unpack that. “Clipless polycarbonate” refers to bodies designed from the ground up for modern clipless mounting systems. They have the correct hole patterns and reinforced mounting points. The mention of “prographix paint with pre…” points to a growing trend of pre-painted, pre-decaled bodies from custom shops.
For the painter who wants a professional look without the airbrush skills, these are a game-changer. They use high-quality, multi-layer paint processes (similar to real car manufacturing) with pre-applied graphics that are baked on or applied with precision. The result is a museum-quality finish that is far more durable and vibrant than a standard hobby-store spray can job. It bridges the gap between DIY customization and professional-grade results. For many, this is the perfect solution: unique, scale-looking design with a flawless, durable finish right out of the box.
Navigating the Marketplace: Where to Find Your Slash’s Perfect Skin
With all these options—unpainted shells for DIY, pre-painted custom jobs, and classic brand bodies—where do you actually shop? Explore a wide range of our Slash 4x4 body shell selection is a promise you’ll find on several key platforms. The landscape is dominated by a few critical hubs:
- Specialist RC Body Retailers: Websites dedicated solely to RC bodies (like JConcepts, Pro-Line’s site, or smaller custom shops) offer the deepest inventories, including the hard-to-find custom designs. They provide expert advice and often have detailed compatibility charts.
- Marketplace Giants (eBay):Find top brands, exclusive offers, and unbeatable prices on eBay. This is the wild west and the treasure trove. You can find everything from old, discontinued bodies to limited-run custom painter commissions. The key is to vet sellers meticulously—check feedback, ask for detailed photos of the actual item (not just stock shots), and confirm compatibility. The “unbeatable prices” often come from liquidations or private sellers.
- Manufacturer Direct & Hobby Shops: For the latest releases from Traxxas, Pro-Line, or Arrma, going direct or to a trusted local hobby shop ensures authenticity and often better warranty support.
Shop now for fast shipping and easy returns! This mantra of modern e-commerce is vital for RC parts. A body is a fragile item. You need a seller who packs it securely (bubble wrap, rigid mailers) and has a clear, fair return policy if it arrives cracked or the wrong item. Always check shipping costs and estimated delivery times before purchasing, especially if you’re eager to start painting.
Actionable Tips for Your Next Body Project
- Always Verify Fitment: Before buying, write down your exact chassis model (e.g., Traxxas Slash 4x4 VXL 2017). Cross-reference this with the body’s listed compatibility. When in doubt, ask the seller.
- Invest in the Right Tools: A good TRA6929 kit (if needed), sharp knives, proper masking tape, and polycarbonate-safe paints/clear coats are worth every penny. Cheap paints will peel and crack.
- Think Long-Term Durability: If you bash hard, consider a thicker polycarbonate body (often labeled “tough” or “premium”). The extra few dollars save you from frequent replacements.
- Embrace the Community:What are some cool bodies people have used? Ask this on forums like RC Groups, Reddit’s r/rc, or Facebook groups. You’ll see incredible, one-off custom paint jobs and discover body models you never knew existed. Share your own progress—the community is a fantastic resource for tips and inspiration.
- Consider a “Beater” Body: For extreme bashing, have one cheap, solid-colored body you don’t care about. Save your beautiful custom paint for smoother runs and display. This mindset lets you enjoy the art without the anxiety of every scratch.
Conclusion: Your Slash, Your Canvas
The “shocking secret” isn’t really a secret at all to those in the know—it’s an open invitation. The “nude” Traxxas Slash 4WD body shell represents pure potential. It’s the starting point for a deeply personal project that blends engineering with artistry. From navigating the critical post/clip vs. clipless compatibility maze to mastering the delicate dance of polycarbonate painting, every step is a rewarding challenge. The market now offers unprecedented access to custom made RC dirt modified bodies that deliver on the scale-looking promise that standard offerings sometimes miss.
Whether you choose to unleash your inner artist with a $36.98 blank shell and a can of paint, or you opt for a professionally finished clipless polycarbonate body with prographix paint, the outcome is the same: a Traxxas Slash that is unmistakably yours. It will stand out at the track, spark conversations, and most importantly, give you the profound satisfaction of seeing your vision tear across the terrain. So, explore a wide range of our Slash 4x4 body shell selection, ask the right questions, invest in the correct mounting hardware, and don’t be afraid to get creative. The perfect body is out there. It’s time to give your Slash the skin it deserves.