Traxxas Light Kit LEAK: What They're Hiding From You!
Are you one of the thousands of RC enthusiasts who jumped on the Traxxas TRX4M craze, only to watch your dreams of a perfectly lit scale rig flicker and die? The promise of a Pro Scale Light Kit is compelling—authentic lighting that brings your scale crawler to life. But a growing chorus of users is uncovering a frustrating pattern: installations that fail, lights that mysteriously die, and a distinct lack of straightforward fixes. This isn't just about a bad batch; it's about a systemic issue that Traxxas doesn't advertise on the box. We're diving deep into the Traxxas light kit leak—the hidden problems, the user-reported nightmares, and the one critical fix that might save your setup.
The Hype vs. Reality: Why Everyone Wants (and Regrets) Light Kits
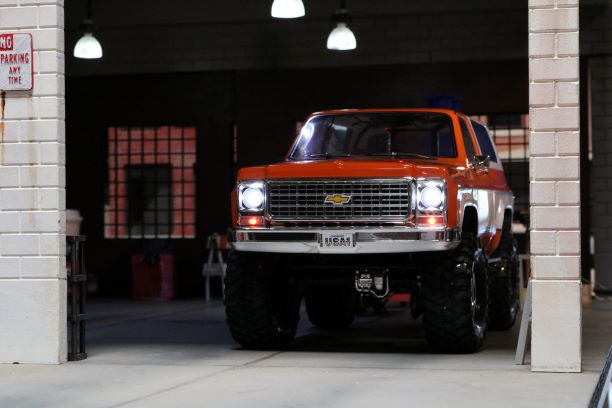
The allure is undeniable. A Traxxas TRX4M or High Trail K10 with functioning headlights, rock lights, and turn signals feels less like a toy and more like a miniature masterpiece. The marketing is powerful, showing trucks conquering rocks under the glow of perfectly aimed LEDs. This drives a massive aftermarket ecosystem, with owners buying "entire pile[s] of aftermarket goodness" to customize their rigs. The Pro Scale Light Kit seems like the crown jewel, an official Traxxas product promising seamless integration. But for many, the moment of truth during installation reveals a harsh reality.
The First Installation Shock: "It's Not Going to Work"
Consider the experience of a dedicated hobbyist who, after fully buying into the TRX4M ecosystem, discovered a devastating truth: the Traxxas Pro Light kit was not going to work with [their] [model]. This isn't a rare edge case. Compatibility is a major, unspoken hurdle. While marketed for the TRX4M platform, subtle variations between model years, specific chassis codes (like the Defender vs. the High Trail K10), and even manufacturing tolerances can create fitment issues. The kit may assume a stock configuration, but once you add aftermarket bumpers, winches, or suspension, the carefully designed light housings and wiring routes can collide with new components. The instructions, often generic PDFs like the "Trx4 motorized toy car pdf manual download", don't always highlight these potential clashes, leaving users to discover the problem only after partially assembling their truck.
- Super Bowl Xxx1x Exposed Biggest Leak In History That Will Blow Your Mind
- Unbelievable How Older Women Are Turning Xnxx Upside Down
- August Taylor Xnxx Leak The Viral Video Thats Too Hot To Handle
The Flickering Nightmare: "Whenever I Steer, the Lights Flicker"
Perhaps the most common and maddening symptom is the intermittent light failure. A user reported: "I have all stock parts but whenever I steer the light flicker on and off." This is a classic diagnostic clue pointing away from the LED modules themselves and squarely at the power delivery and wiring. The steering linkage or axle rotation is physically moving something—usually a wire harness that isn't properly secured or is too tight. This movement causes a momentary break in the circuit.
- Root Cause 1: Pinched or Moving Wires. During installation, a wire might be routed too close to a steering tie rod, CV joint, or suspension arm. As the suspension articulates or the wheels turn, the wire gets pinched or pulled.
- Root Cause 2: Poor Grounding. A ground wire with a weak connection at the chassis or module can lose contact under vibration or movement.
- Root Cause 3: Loose Connectors. The plug connecting the lighting module to the main harness or the individual light connectors might not be fully seated.
This issue turns a static display model into a frustrating, unpredictable light show. The question then becomes: "Any easy fixes or do I need to replace the light kit?" Often, the answer is a tedious hunt for the pinched wire, not a replacement.
The Deep Dive: Installation Instructions and Hidden Pitfalls
Let's walk through a typical installation, using the official steps as a map to where things go wrong. A standard LED lighting module installation guide might read:
- How Destructive Messages Are Ruining Lives And Yours Could Be Next
- Exclusive Mia River Indexxxs Nude Photos Leaked Full Gallery
- Channing Tatums Magic Mike Xxl Leak What They Never Showed You
"Remove the headlights (e), tail lights (f), fender flares (g), inner fenders (h), and rock light covers (i). Move the two 4x5mm screw pins (j) that attach the rear [bumper/fender]. Install the LED lighting module (a) on the left chassis floor pan. Secure with the 2.5x15mm cap screws (2)."
On paper, it's straightforward. In practice, it's a minefield.
- The Removal Phase: Taking off stock fender flares and inner fenders is often the first major hurdle. These plastic clips are notoriously fragile. Breaking them before you even start the light install sets a bad tone. Furthermore, removing them creates a sharp, unfinished edge that can easily chew through wire insulation if not carefully padded.
- The Module Placement: "Install on the left chassis floor pan" sounds simple. But where exactly? The instructions rarely provide a precise, measured location. Users must guess, often placing it where it later interferes with a driveshaft, battery strap, or electronics tray. The 2.5x15mm cap screws are tiny and easy to strip or drop into the abyss of the chassis.
- The Wiring Gauntlet: This is the #1 failure point. The kit includes long harnesses that must be routed from the module, up through the chassis, and to each light location. The instructions provide no guidance on avoiding pinch points. The harness must be:
- Loose enough to allow full suspension droop and steering lock.
- Secure enough not to dangle and get caught on rocks or the transmission.
- Padded where it passes through sharp metal holes or against plastic edges.
Failing any of these leads directly back to the flickering problem.
The Community Verdict: Is It Even Worth the Trouble?
A significant faction of experienced RC owners has looked at this entire process and concluded no. One user starkly stated: "Personally I’ve always been afraid of this happening so I’ve steered clear of light kits. It’s just one more part that can break and I don’t think it’s worth the [hassle]." This perspective is born from hard experience.
Another user, who has "4 cars and put lights on all of them," offered a damning summary: "Everything from a $7 kit on amazon to the Traxxas kits. They were all a waste of time and money." Why this extreme sentiment?
- Durability Concerns: RC rigs are built to bash. Lights, with their small wires and plastic housings, are vulnerable. A single hard impact or a rock smash can shatter a lens or sever a wire.
- Complexity vs. Reward: The installation time can be 2-3 hours for a result that is fragile. For many, the joy of driving outweighs the static beauty of lights.
- Inconsistent Quality: The gap between the marketing promise and the actual user experience is vast. "You can tell if the car [has lights]" is the only real metric, but the journey to get there is fraught.
The Silver Bullet? A Solved Mystery from the High Trail K10
Not all hope is lost. A crucial data point comes from a user who installed the kit in a new High Trail K10 truck. They experienced a specific, advanced failure: "The LED light kit works fine however after about 5 minutes the stop/signal lights and sometimes the reverse lights stop working." This is different from the steering-induced flicker. The lights worked initially, then died after a short run. This points to a thermal or connection failure—something that gets hot or works loose under use.
The breakthrough came with "Update 2 (issue solved)". The user revealed: "Traxxas support got back to me yesterday. The problem was an incorrectly wired jumper plug (the double jumper)."
This is the critical leak they're hiding. The "double jumper" is a small, often overlooked plug that bridges circuits for functions like brake lights and turn signals. If this plug is not fully inserted, or if its pins are misaligned during manufacturing, it can create an intermittent connection. The initial power surge works, but as the plug heats up minutely or vibrates, the connection fails, killing those specific circuits. The fix is simple but non-obvious: physically remove, inspect, and reseat the double jumper plug on the lighting module. Ensure every pin is straight and making contact.
Your Action Plan: Diagnosis and Fixes Before You Rip Your Hair Out
If you're staring at a partially lit TRX4M, don't panic or immediately order a replacement. Follow this diagnostic flowchart:
- Visual Inspection (Static): With the truck on a stand, turn the lights on. Slowly turn the steering wheel full lock left and right. Watch the wiring from the steering servo area back to the module. Look for any wire that tightens, pinches, or moves. Do the same by pushing and pulling the suspension. Secure any moving wire with a zip-tie, leaving a generous loop, and pad the contact point with electrical tape or a piece of fuel tubing.
- Jumper Plug Check (The K10 Fix): Locate the lighting module. Find the small, usually black, plastic jumper plug with two rows of pins (the "double jumper"). Unplug it. Look for bent pins. Reseat it firmly until you hear/feel a click. This solves the "works for 5 minutes then dies" issue.
- Connector Audit: Unplug and replug every connector in the lighting system: module to harness, harness to each light. Corrosion or a loose fit is a common culprit.
- Ground Check: Ensure the module's ground wire (usually a black wire) is bolted securely to a clean, paint-free metal spot on the chassis. Sand the area if needed.
- Battery Power: A weak or failing LiPo can cause voltage sag that affects sensitive LED circuits. Test with a fully charged, high-C rated battery known to be good.
The Unavoidable Truth: Are Official Traxxas Kits Flawed?
Based on the overwhelming user reports, the answer is a qualified yes. The design has inherent vulnerabilities:
- Routing is not driver-friendly. The paths suggested in manuals like those you can "view and download online" are often the easiest for a factory robot, not for a hobbyist with a zip-tie and a flashlight in a cramped chassis.
- Connector quality is suspect. The "double jumper" issue suggests a quality control gap.
- No vibration damping. The modules and connectors are not isolated from chassis vibration, a constant in RC crawling.
This doesn't mean every kit is broken, but it means you must be your own quality control engineer. The "leak" isn't a secret document; it's the gap between the advertised perfection and the on-truck reality, a gap filled with flickering lights and frustrated users.
Conclusion: To Light or Not to Light?
The Traxxas Pro Scale Light Kit remains a tempting upgrade. The glow of authentic rock lights on a night crawl is magical. But you must enter this endeavor with your eyes wide open. It is not a plug-and-play, worry-free accessory. It is a precision wiring project that demands patience, meticulous routing, and a critical eye for connection integrity.
Before you buy, ask yourself: Is the final aesthetic worth the 3-5 hours of delicate installation, the constant fear of a pinched wire, and the potential for intermittent failures? For the purist builder, the answer is yes, and the fixes outlined above are part of the craft. For the basher who wants to drive, the risk-reward ratio may finally tip toward "it’s just one more part that can break."
The real Traxxas Light Kit LEAK is this: they sell you the dream, but the gritty, frustrating reality of keeping those lights on is yours alone to solve. Your truck, your choice. Just go in knowing that the flicker you see might not be a bad LED—it might be the sound of a hidden design flaw finally showing its face.