The Secret Leak-Free Dog Door Hack That's Making Sliding Glass Doors Obsolete Overnight!
Have you ever stood by your sliding glass door, watching your beloved dog scratch frantically at the track or whine pitifully because they can’t get to the backyard on their own? That heart-wrenching scene of a pet wanting freedom but being blocked by a solid pane of glass is a universal frustration for pet owners. It’s more than just an inconvenience; it’s a barrier to your dog’s happiness and a constant source of noise and anxiety for everyone. But what if you could permanently solve this problem with a clever, leak-free hack that blends seamlessly into your existing door, making traditional, bulky pet doors seem like a thing of the past? The solution isn’t just about cutting a hole; it’s about a revolutionary approach to pet freedom that’s taking the DIY world by storm.
This guide dives deep into the innovative method popularized by creators like Jonny DIY, who has amassed a massive following of over 140,000 subscribers by sharing exactly this kind of practical, game-changing home improvement hack. We’ll move beyond the basic concept to provide a comprehensive, step-by-step walkthrough. You’ll learn about the vast array of pet door options, how to choose and measure for the perfect fit, the exact installation process for a flawless result in a sliding glass door, and critical tips to weatherproof and secure your new pet flap. By the end, you’ll have all the knowledge needed to give your furry friend the ultimate gift of independence, transforming your sliding door from a barrier into a gateway.
The Genius Behind the Hack: Meet Jonny DIY
Before we get into the nuts and bolts, it’s worth understanding the source of this viral solution. The method we’re detailing is largely credited to the popular YouTube channel Jonny DIY, a creator dedicated to practical, budget-friendly home projects that deliver professional-looking results. With a subscriber base exceeding 140,000, Jonny has built a reputation for clear instructions, clever hacks, and a focus on real-world problems faced by homeowners and pet owners alike.
- West Coast Candle Cos Shocking Secret With Tj Maxx Just Leaked Youll Be Furious
- Unbelievable How Older Women Are Turning Xnxx Upside Down
- Exposed How West Coast Candle Co And Tj Maxx Hid This Nasty Truth From You Its Disgusting
His specific approach to installing a pet door in a sliding glass door addresses the three biggest fears pet owners have: leaks, security gaps, and aesthetic disaster. Instead of the traditional method of replacing an entire glass panel—a costly and permanent job—his hack utilizes the existing door structure and a specialized pet flap system to create a clean, functional, and weathertight solution. This method empowers everyday DIYers to achieve a high-end result without the high-end price tag or the need for professional glaziers.
| Detail | Information |
|---|---|
| Channel Name | Jonny DIY |
| Platform | YouTube |
| Subscribers | 140,000+ |
| Niche | DIY Home Improvement, Hacks, Pet Projects |
| Signature Project | Leak-Free Sliding Glass Dog Door Installation |
| Core Philosophy | Professional results through clever, accessible DIY methods |
The Agony of the "Trapped Pet": Why This Hack is a Game-Changer
4. Have you ever watched your dog scratching at the door?
It’s a scene played out in millions of homes. Your dog hears a squirrel, smells the fresh grass, or simply feels the call of nature, and they make a beeline for the door. They press their nose against the glass, paws scrabbling on the track, letting out a series of desperate whines or sharp barks. This isn’t just annoying; it’s a sign of their unmet need. Dogs are naturally curious and require regular stimulation and bathroom breaks. Being confined to one part of the house can lead to anxiety, boredom, and even behavioral issues like excessive barking or destructive chewing.
5. It can be frustrating when they want to go outside but can’t get through.
For the owner, this is a dual frustration. First, there’s the emotional guilt of hearing your pet’s plea and knowing you’re the barrier. Second, there’s the practical hassle. You have to stop what you’re doing—whether it’s working, cooking, or relaxing—to get up and manually open the door for them, often multiple times an hour. It disrupts your flow and turns your home into a prison for your pet. This constant back-and-forth is unsustainable and points to a clear need for an autonomous solution.
- Jamie Foxx Amp Morris Chestnut Movie Leak Shocking Nude Scenes Exposed In Secret Footage
- Just The Tip Xnxx Leak Exposes Shocking Nude Videos Going Viral Now
- Exclusive Mia River Indexxxs Nude Photos Leaked Full Gallery
6. Give your pet freedom—find out how here.
The promise of freedom is the core emotional driver for this project. True pet freedom means your dog can decide when to go out to explore, sunbathe, or do their business without needing your intervention. It means peace of mind for you, knowing they’re not in distress, and a happier, more stimulated pet. This freedom strengthens the human-animal bond by removing a daily point of friction. The "how" is what this entire article is about: a specific, leak-free installation method that provides this freedom without compromising your home’s integrity.
Understanding the Landscape: A Huge Variety of Pet Doors Available
3. There are a huge variety of pet doors available.
Before you buy anything, you must understand the market. Pet doors, also called cat flaps or dog doors, come in countless designs tailored to different needs, materials, and budgets. Choosing the wrong type for a sliding glass door is the first step toward a leaky, insecure disaster.
- Sliding Door Insert Panels: These are full or partial replacement panels that fit into the track of your existing slider. They have the pet door pre-installed. They are often the most expensive but offer a clean, factory-installed look.
- Flap-Style Pet Doors for Sliders: This is the category where the Jonny DIY hack shines. These consist of a rigid frame that mounts to the stationary panel of your sliding door (or sometimes the sliding panel itself), with a flexible vinyl or rigid plastic flap. They are designed specifically for the thickness and track system of sliding doors.
- Track-Mounted Systems: Some innovative designs mount entirely within the door track itself, requiring minimal modification to the glass panel. They are excellent for renters or those wanting a non-permanent solution.
- Material Matters: Flaps can be made from flexible vinyl (quiet, good for small pets), acrylic (rigid, durable, good for large dogs), or even insulated double-pane flaps for extreme climates.
- Feature Sets: Look for magnetic closures to keep the flap shut against wind, locking mechanisms for security, and weather seals around the frame. Some high-end models have 4-way locking (in-only, out-only, both, locked).
The Blueprint for Success: Measurements, Types, and Installation
7. With the right measurements and installation process, you can provide your dog with a convenient and safe way to access the outdoors.
This is the non-negotiable foundation. A poorly measured or installed pet door is the #1 cause of leaks, security issues, and pet refusal to use it.
How to Measure Your Dog (The "Rise" Method):
Forget just the width. The critical measurement is the "rise"—the height from your dog’s withers (the top of their shoulders) to the floor when they are standing naturally. This determines the minimum height of the pet door opening.
- Have your dog stand squarely against a wall.
- Place a stiff book or ruler on their back, bridging the shoulder blades.
- Mark the wall at the bottom of the book. Measure from that mark to the floor. Add 1-2 inches for comfort. This is your minimum door height.
- For width, measure the broadest part of your dog’s chest (typically just behind the front legs). Add 2-3 inches for comfortable passage.
Example: A dog with a 15-inch rise needs a door with a minimum opening height of 16-17 inches. A door with a 12-inch wide opening would suit them.
Measuring Your Sliding Glass Door:
You must measure the stationary panel (the one that doesn't move) where you’ll install the frame. Key measurements:
- Panel Width: The width of the stationary glass pane.
- Panel Thickness: The exact thickness of the glass at the edge (usually 1/4" or 3/8" for single pane, more for double-glazed). This is the most critical spec for buying the correct pet door.
- Track Depth: The depth of the metal track the door slides in. The pet door frame must fit within this track or mount to the panel without interfering.
11. This guide will walk you through installing a sliding glass dog door, also known as a pet door for sliding doors or a sliding door pet flap, ensuring your furry friend gets easy patio access.
We’ll now focus on the installation process for the most common and hack-friendly type: the frame-and-flap system that mounts to the stationary panel. This is the method that achieves the "factory look" mentioned in the key sentences.
Step-by-Step Installation Concept:
- Purchase the Correct Pet Door: Ensure the model is rated for your door's glass thickness and panel width. It should come with a heavy-duty aluminum or vinyl frame and a weather-sealed flap.
- Prepare the Panel: Thoroughly clean the stationary glass panel where the frame will mount. Use a high-quality glass cleaner and lint-free cloth.
- Dry-Fit the Frame: Place the frame against the glass. Most quality systems use suction cups or heavy-duty adhesive pads (like 3M VHB tape) for a non-permanent, leak-proof seal to the glass surface. This is the key "hack" element—no drilling through the glass or frame.
- Mark and Secure: Once perfectly positioned (usually centered, with the bottom a few inches off the floor to match your dog's rise), mark the mounting points. Apply the adhesive pads or engage the suction cup system per the manufacturer’s instructions. Apply firm, even pressure for the recommended time (often 24 hours) to create a permanent, waterproof bond.
- Install the Flap: Attach the flap to the frame. Ensure it swings freely and closes securely with magnets.
- Test and Adjust: Let your dog sniff it, prop it open initially, and use treats to encourage use. Check for any gaps around the frame after a rainstorm.
8. DIY Sliding Glass Dog Door & 10. Discover innovative DIY solutions for installing pet doors in sliding glass doors
The innovation lies in the mounting system. The best DIY solutions avoid:
- Drilling through the glass: A recipe for cracks and leaks.
- Replacing the entire glass panel: Prohibitively expensive.
- Using temporary, flimsy solutions: That blow out in the wind.
Instead, they leverage industrial-strength adhesion to the glass surface and precision engineering of the frame to distribute pressure. The frame often has a lip or gasket that presses against the glass, creating a secondary seal. Some advanced kits even include a sill extension that bridges the gap between the door frame and the pet door frame, eliminating the ledge where water could pool and seep in.
9. 5 Practical Ideas to Install, Weatherproof, and Secure a Pet Flap in Glass Sliders
- The Suction Cup & Gasket System: Ideal for renters or those wanting a removable option. Use a pet door frame with large, heavy-duty suction cups and a thick, compressible rubber gasket. Ensure the glass is impeccably clean and smooth.
- The Permanent Adhesive Bond (VHB Tape): For a permanent, leak-proof installation. Clean the glass with isopropyl alcohol, apply the 3M VHB tape strips to the frame, press firmly, and let cure for 72 hours. This creates a bond stronger than many screws.
- The Internal Track Mount: Some pet doors are designed to slide into the bottom track of the sliding door itself, sitting behind the stationary panel. This hides the frame completely and uses the existing door structure for support.
- Weatherproofing with Silicone: After installation, run a thin, continuous bead of clear, UV-resistant silicone caulk along the outer perimeter where the frame meets the glass. Smooth it with a finger or tool. This is your final defense against wind-driven rain.
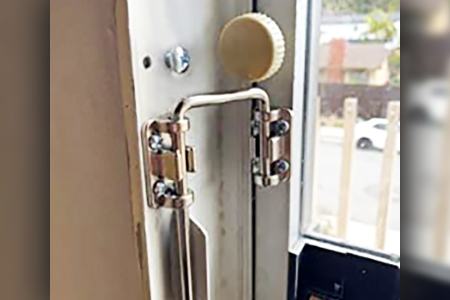
- Security Enhancements: The flap is a potential entry point for burglars. Use a sliding door lock that engages when the door is closed. Additionally, choose a pet door with a locking slide or cover on the inside. You can also install a secondary sliding bolt on the frame itself.
12. You’ll learn about different types of dog doors, how to measure your dog, and how to install them
Let’s synthesize the types with their best-use cases for sliding doors:
- Best for Large Dogs & Permanent Homes: A heavy-duty, aluminum frame with an acrylic rigid flap and a VHB tape mounting system. Offers maximum security and weather resistance.
- Best for Small/Medium Dogs & Renters: A vinyl frame with a flexible vinyl flap and a suction cup system. Easy to remove, no residue.
- Best for Extreme Weather (Hot/Cold): An insulated double-flap system or a flap with a magnetic seal all around. The air pocket between flaps provides excellent thermal breaks.
- Best for Aesthetic Integration: A low-profile frame in a color that matches your door frame (white, bronze, black). Some even have a removable interior cover that makes the door look like a plain panel when not in use.
Protecting Your Sanctuary: Weatherproofing and Home Security
13. You’ll also find tips to keep your home.
A pet door is a potential vulnerability. Your strategy must address water, air, insects, and intruders.
- The Leak-Proof Trinity: 1) Perfect Glass-to-Frame Seal: Achieved via gaskets and adhesive. 2) Flap Seal: Magnetic edges that close tightly. 3) Sill Drainage: The frame should have small weep holes at the bottom to drain any incidental condensation, not a solid seal that traps water.
- Energy Efficiency: Look for an Energy Star rated pet door. These have specific R-values and are tested for air infiltration. A good one will prevent your HVAC from working overtime.
- Security is Paramount: Never rely on the flap lock alone. Always use your primary sliding door lock (the kind that screws into the frame or uses a security bar). Consider a door sensor alarm that chimes if the door is opened unexpectedly. For high-security needs, install a cage or pen on the outside that the pet door opens into, so even if the flap is forced, the intruder is still contained.
- Pest Prevention: Ensure the flap’s bottom edge sits flush with the floor or a threshold. A gap is an invitation for rodents and insects. Some flaps have brush seals along the bottom.
The Seamless Result: What the Final Product Looks Like
2. The dog now has run of the house and backyard, and the dog door looks like it is part of the factory sliding glass door.
This is the ultimate validation of a successful DIY project. When done with the right kit and attention to detail, the pet door installation should look intentional and integrated. The frame, if chosen in a matching color, will appear as though it was part of the original door manufacturing. There will be no unsightly brackets, no gaping holes, and no awkward bulk. The stationary panel of your slider now has a dedicated, purpose-built portal. The transformation is profound: your dog gains the run of the house and the yard, coming and going as they please, while your home’s aesthetic and structural integrity remain completely intact. The scratching stops, the whining ceases, and a new era of pet-parent harmony begins.
Conclusion: Your DIY Journey to Lasting Freedom Starts Now
The "secret leak-free dog door hack" isn't magic; it's the result of understanding the specific challenges of sliding glass doors and applying the right engineering solution. It’s about moving away from destructive, permanent alterations and toward clever, adhesive-based mounting that respects your home’s value. By following the principles outlined—accurate measurement, selecting the correct flap type for your dog and climate, meticulous surface preparation, and layered weatherproofing/security—you can achieve the professional, factory-integrated look that makes traditional pet doors obsolete.
This project, championed by experts like Jonny DIY, represents the pinnacle of functional DIY: solving a real problem, improving quality of life for your pet, and enhancing your home’s value and appearance. It turns the sliding glass door from a barrier into a bridge, connecting your indoor and outdoor worlds seamlessly. Stop watching your dog scratch at the glass. Take the measurements, invest in a quality sliding door pet flap with the proper mounting system, and follow the installation steps with patience. In one weekend, you can install the gateway to your dog’s freedom and reclaim your own peace of mind. The hack is out there; now it’s time to make it yours.